Today's blog post is showcasing Heat Embossing. I know this technique can be a smidge intimidating but trust me, the results are amazing. Join me and my colleagues as we focus on this amazing method.
One of my favorite things to do when heat embossing is to do this on top of the metallic paper.
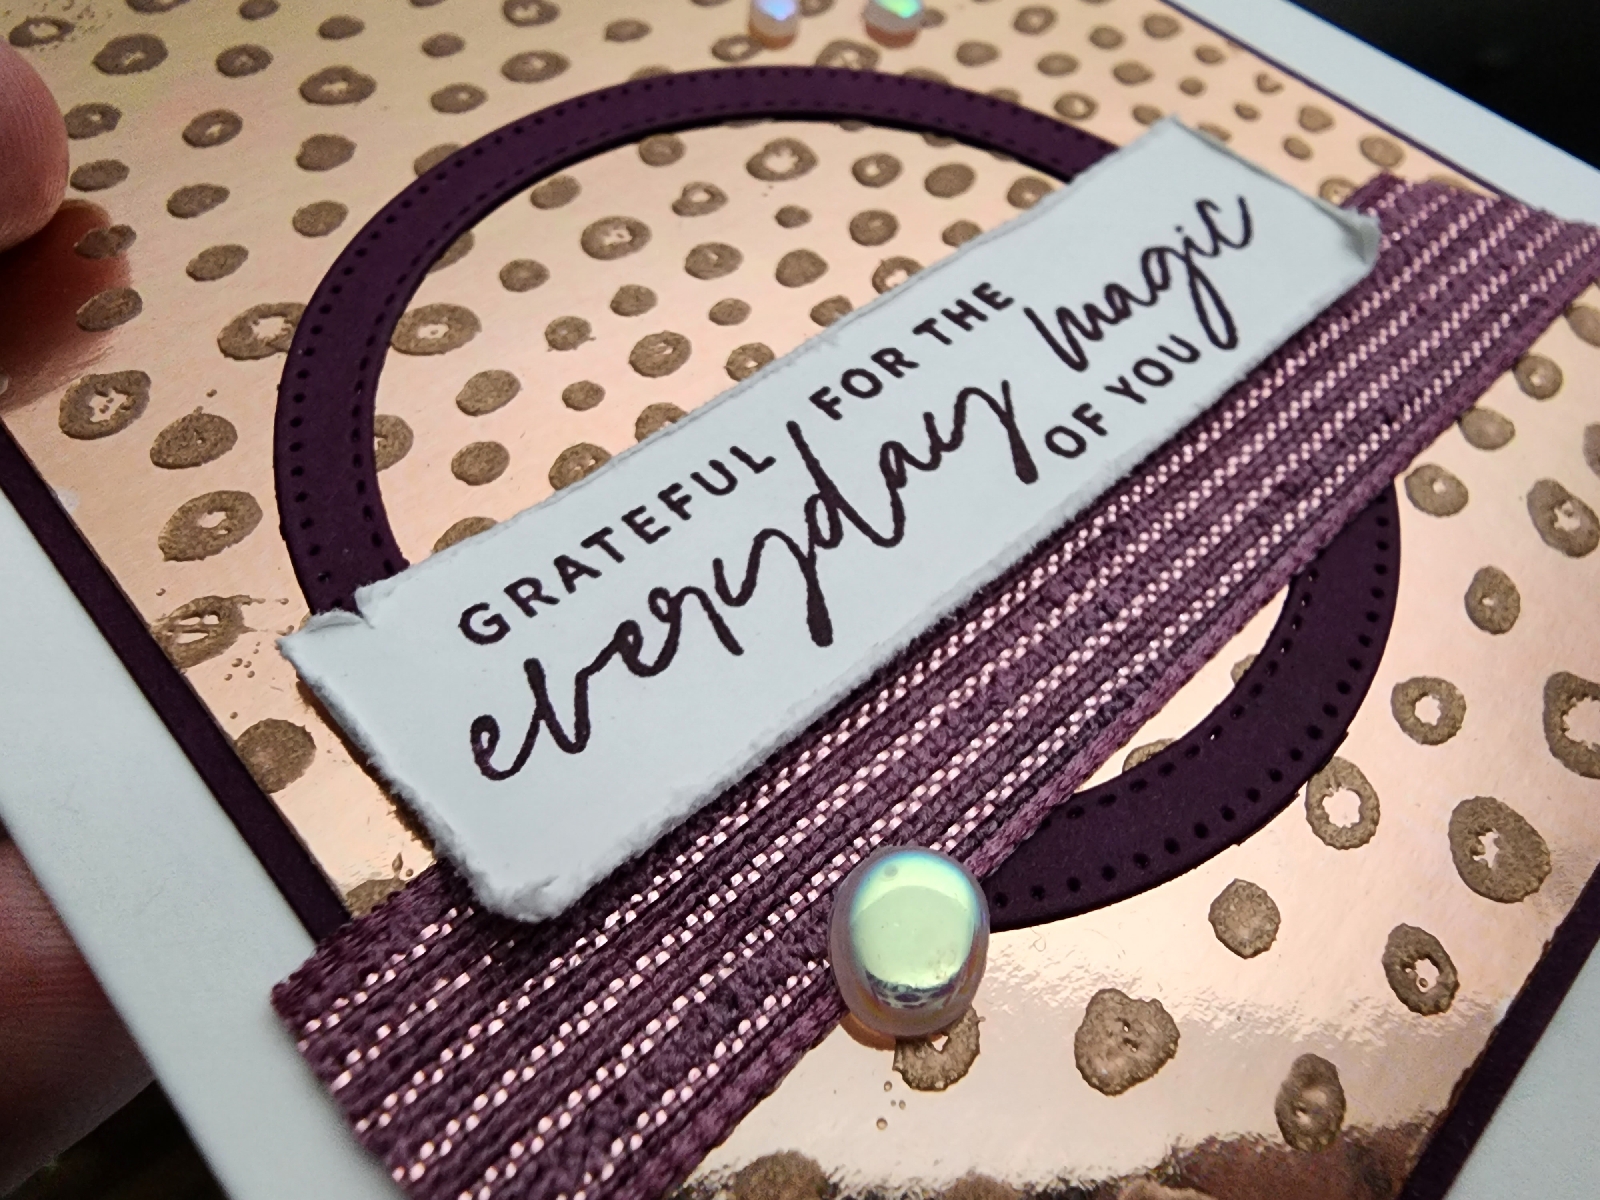
For this card, I used Rose Gold Specialty Paper with Copper Embossing Powder. Included in the Rose Gold Specialty Paper pack are 3 different finishes: iridescent, matte, and metallic. For my card I used the metallic finish which is a just like a shiny foil.
Stampin' Up! offers 2 packages of embossing powders. The first group includes black, clear, and white while the second grouping has copper, gold, and silver.
I thought that the copper hue coordinated the best with the rose gold paper. To contrast the metallic background, I brought in Blackberry Bliss and Basic White colors.
Now let's not forget the other rose gold item we carry, Rose Gold & White 5/8" Striped Ribbon. As you can see in the above picture, I used the Stampin' Blends to color the ribbon, light Blackberry Bliss.
You can also see the added texture on the saying the ring of cardstock too. Texture is one of the things I really love on a card. I can add a bit more by using Stitched dies or the edge of my paper snips to rough things up.
Below you will find a shopping list for everything except the stamps and pearl embellishment. These items are from the new Mini Catalog (Jan-April 2023) that starts on January 5th. Please reach out with any questions!
Visit all the other awesome blogs. I would love it if you would leave me a comment and share my post as well.
What a gorgeous Sunday morning....and yes it's go time! For those of you who don't know me, I am a procrastinator at heart. I am a busy mom of 3 amazing "adult" boys, full time customer service specialist, and amazing wife (if I do say so myself). Sunday mornings are my jam. I typically don't have to wake up early but I do...it's my time to work on things that I need done or just want to get the day going. So this morning, I'm sitting here...too lazy to get up off the couch to get a beverage..so I have a leftover Seagram's "Jamaican Me Happy" that I'm sipping on at 8am...it's 5'oclock somewhere...and doing this blog post...cause I really want to!
Enough about me...let's get to the real reason you're here!
Today I am showcasing this amazing Stampin' Blends Alcohol Technique. Yes I know...I've seen it around but this was the first time I took the time to try it. And you will not be disappointed. I follow instructions I found online. I am not going to name any names since I watched 3 or 4 different people and then came up with my way.
The basic concept for each card is the same. I used Stampin' Blends (alcohol based marker) to color on our Vellum Cardstock. This is important!!! Our vellum cardstock is thicker and doesn't curl up like other places do. So you will get the best result with Stampin' Up! Vellum Cardstock. After you color, you will apply Isopropyl Alcohol...or more commonly known as Rubbing Alcohol. You will need at least 91% concentrate for this technique.
This first card, I colored with the blends and just scribbled circular patterns until the background was covered. I used all "dark" blends: Magenta Madness, Night of Navy, Bermuda Bay, and Blackberry Bliss. You will then dip your largest Water Painter brush into the alcohol and dab it over one color at a time adding more alcohol as you go. I did light to dark for my colors. Make sure not to get too much alcohol as it will dilute the color.
This card, I colored across sideways. When I added the alcohol, I used the medium brush so I would have more control. I swiped sideways starting with the darker color. I wanted to keep it looking sorta like waves or a sunset with the layers of colors. Also, you can overlap the hues used to and get a muddled look as well that still coordinates with the colors used. I used Misty Moonlight, Bermuda Bay, and Granny Apple Green.
For my last example I wanted more of a marbled look. I needed the white space. On this one, I colored in scribbled circles but left them farther apart. I used the smallest of the Water Painters brushes, and dipped it in the alcohol. After dipping it in, I splotted...so blotted and splashed it down...over the colored scribbles. I needed the excess of the alcohol to transfer the hues around my vellum. This is why having a higher concentrate of the rubbing alcohol is important. I then used a straw to just blow slightly to move the hues together. Blends used were: Calypso Coral, Soft Succulent, Polished Pink, and Fresh Freesia.
I hope you enjoyed my Share It Sunday! Hubby just got up and is making breakfast...totally laughed at my laziness and willingness to drink alcohol at 8am...but it kind of went with the theme of my blog post today...so there's that. haha.
Check out all the other great posts...and I appreciate all comments and shares as well.
What comes to mind when I hear the word Mother? Well I think of a hard working, honest, loving, amazing, super woman, yellow, and flowers...and of course...help Me Rhonda...help help me Rhonda. *ya know--that's my Mom's name ;)
Since my mother and I both enjoy gardening and flowers, I thought I would pull out the Jar of flowers stamp set and my Stampin' Blends!
I stamped the images I was going to use in Early Espresso ink. To create the jar, I stamped and then colored the stems with the Old Olive Stampin' Blends. To add the water, I used Misty Moonlight ink but stamped off twice to get the hue I wanted.
Some of the details on my card include a gold embossed jar lid, gold leafing using the tear & tape adhesive. This is on a layer under the birch background piece. I also colored an additional sunflower and cut it out to pop up. I used 5 different sets of the Stampin' Blends to get the different colors...a little crazy...I know! I also used very vanilla card stock so the colors would be a little more muted and not so in your face bright. I colored the whole sunflower and then went over the center with the dark crumb cake blends.
For the birch background, I used Sahara Sand ink and a blending brush around the outside to create a little shadow country look.
Since I wanted a colored jar, I lightly used the Calypso Coral light blend and went over the whole jar, adding some darker edges.
For the ribbon, I used my Ribbon Technique from my blog last month.
And of course, this saying is everything. How so very true.
Love ya Mom!
I hope you enjoyed my blog hop. Don't forget to check out all the other projects on these amazing blogs and leave me a comment.


 Striped Ribbon")
 Specialty Paper")


")


